
Key concepts
Physics
Wavelength
Frequency
Energy
Introduction
Have you ever bitten into a microwaved snack, and the first bite is scalding hot but the second bite is still frozen? If you’ve experienced this, then you know microwaves have hot and cold spots. This is why they usually have a rotating tray to ensure that your food is evenly cooked. In this activity you’ll use marshmallows to map where the hot and cold spots are in your microwave. Get ready to heat things up!
Background
You probably use your kitchen microwave oven so often you don’t even think about how it works—or why it can heat your food so quickly. Despite being an everyday kitchen appliance, microwave ovens are fairly sophisticated pieces of scientific equipment!
On supporting science journalism
If you're enjoying this article, consider supporting our award-winning journalism by subscribing. By purchasing a subscription you are helping to ensure the future of impactful stories about the discoveries and ideas shaping our world today.
For this activity it’s important to understand the basics of how microwave ovens heat your food. They convert electrical energy (coming from the wall outlet) into very small radio waves. Because these radio waves are so small, we call them microwaves! These waves travel at the speed of light (186,000 miles per second) and carry a huge amount of energy. These microwaves enter the food compartment of the oven, where they bounce back and forth off the walls; they stop bouncing, however, when they hit food. Instead of being reflected, the microwaves penetrate the food, causing its water molecules to vibrate, which collide with one another, causing more vibrations. With these vibrations, the food’s temperature rises—and the more the molecules vibrate, the hotter the food becomes.
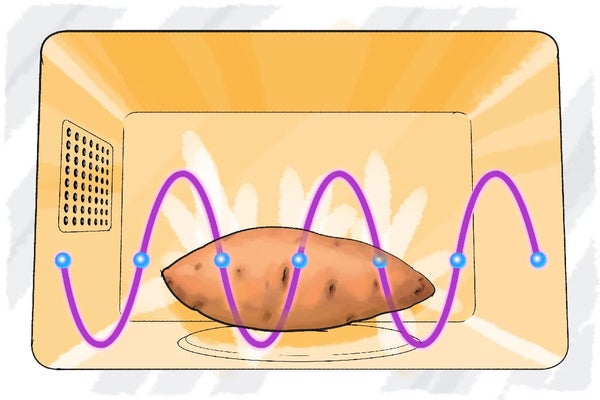
You have probably noticed microwave ovens don’t always heat your food evenly. This is because microwaves, just like light, sound and even ocean waves, have peaks and valleys. Microwaves carry the most energy at their peaks and valleys and very little energy at the transition point. As these waves travel across your microwave oven they hit the food at different points in their wave cycles. Therefore, after cooking a burrito in your microwave oven, your first bite might be boiling hot and the next bite still frozen.
In this activity we’re going to map the peaks and valleys of the waves traveling through your microwave oven and observe how your oven's rotating tray helps your food cook more evenly.
Materials
Microwave with a removable rotating tray
Two large, microwave-safe casserole dishes (Ensure they fit inside the microwave and will rotate freely on the tray.)
Two bags of marshmallows (Chocolate chips will work, too.)
Butter (at least four to six tablespoons)
Oven mitts
Fork
Piece of paper
Pen or pencil
An adult helper
Large bowl
Ruler (optional)
Recipe and ingredients to make marshmallow treats or another marshmallow-based recipe (optional—to avoid wasting the marshmallows used in this activity)
Preparation
Butter both the casserole dishes (This will make it easier to clean once you’ve finished testing.)
Arrange your marshmallows in rows across your first casserole dish so the marshmallows are packed together closely.
Place the casserole dish on the microwave’s rotating tray.
Procedure
Set the microwave to low power and one minute. Hit start. (Note: Microwave power varies. If your marshmallows aren’t affected by this temperature and time, try increasing the time that your marshmallows are in the microwave.)
After the time is up carefully remove the dish and observe the marshmallows. (Caution: the dish may be hot! Use oven mitts and ask an adult to help you!)
Use your fork to gently poke the marshmallows. Note the texture and appearance. How did the marshmallow’s appearance change? How did the marshmallow’s texture change? Are they softer or stickier than before? Do all the marshmallows look and feel the same or did some change more than others? What do you think caused them to change?
Set the dish aside.
Arrange the second bag of marshmallows in your second casserole dish, the same way that you did the first.
Remove the rotating tray from your microwave. (Ask an adult for help with this step!)
Place the casserole dish in the microwave.
Set the microwave for low power, for one minute. Hit start.
When the time is up, carefully remove the dish and observe the marshmallows. (Caution: the dish may be hot! Use your oven mitts and ask an adult to help you!)
Again, use your fork to gently poke the marshmallows. Note the texture and appearance. How did the marshmallow's appearance change? How did the marshmallow's texture change—are they softer or stickier than before? Do all of them look and feel the same or did some change more than others? What do you think caused the changes?
See if you can find a pattern to which marshmallows melted and which ones didn’t. Try to identify spots in the dish where the marshmallows did not melt, and other places where they did. If you would like, use your ruler to measure the distance between two adjacent melted spots. Is the distance similar between melted spots?
Compare the marshmallows in the two dishes. Are more marshmallows melted in one dish compared with the other? Which dish seems to have melted the marshmallows most evenly?
Observations and results
In this activity we used marshmallows to map the hot and cold spots in your microwave oven that are caused by the wavelength of the microwaves that heat your food. In this first part of the activity your marshmallow dish was placed on the rotating tray inside your microwave oven. In this case, you might have found that some marshmallows were slightly more melted than others.
In contrast, during the second part of the activity you removed the rotating tray so that the marshmallow dish didn’t move as it was heated. In this case, you should have observed a more distinct contrast between melted and unmelted sections of marshmallows because the dish wasn’t spinning on the tray.
More to explore
Measuring the Speed of “Light” with a Microwave Oven, from Science Buddies
Tasty Arrangements: How to Position Food in Microwave Cooking, from Science Buddies
Science Activities for All Ages!, from Science Buddies
This activity brought to you in partnership with Science Buddies

